Introduction: Why This Garlic Bread Is Truly Special
Pull-apart cheese garlic bread is not just a side dish—it’s an experience. The moment you set it on the table, hands reach for it before plates do. It’s interactive, indulgent, aromatic, and irresistibly comforting. Each square pulls away easily, stretching warm melted cheese while releasing the intoxicating scent of garlic, herbs, and toasted bread.
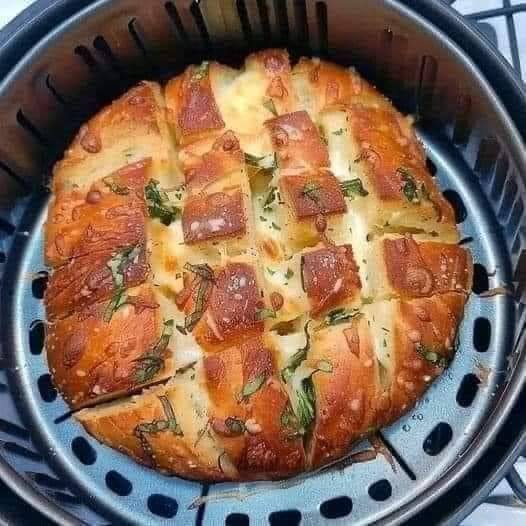
This particular version is inspired by the viral pull-apart breads you’ve probably seen everywhere, but it’s refined for maximum flavor, better texture, and flexible ingredients. It can be baked in the oven or made in an air fryer like the one shown in the image. The recipe uses butter or ghee for richness, olive oil for balance, herbs for depth, and generous cheese for that dramatic pull everyone loves.
Whether you’re making this for a party, a cozy movie night, game day, or as a show-stopping side for pasta or soup, this recipe is one you’ll come back to again and again.
Ingredients
For the Bread Base
-
1 round artisan loaf (sourdough, boule, or crusty white bread)
The bread should be sturdy with a crisp crust and soft interior.
For the Garlic Butter Mixture
-
2 tablespoons unsalted butter, melted
or ghee for a slightly healthier, lactose-friendly option -
2 tablespoons olive oil
-
3–4 cloves garlic, finely minced or grated
-
1 tablespoon finely chopped parsley
-
1 teaspoon Italian seasoning
-
½ teaspoon salt (adjust to taste)
-
¼ teaspoon black pepper
For the Cheese Filling
-
1½ to 2 cups shredded mozzarella cheese
-
½ cup shredded cheddar, Monterey Jack, or provolone
-
¼ cup grated Parmesan cheese
Optional Add-Ins (Highly Recommended)
-
Red pepper flakes (for heat)
-
Fresh thyme or rosemary (for earthiness)
-
Garlic powder (extra punch)
Equipment Needed
-
Sharp serrated knife
-
Small saucepan or microwave-safe bowl
-
Pastry brush or spoon
-
Baking dish, oven-safe skillet, or air fryer basket
-
Aluminum foil (if oven baking)
Step-by-Step Instructions
Step 1: Preparing the Bread
Place the round loaf on a cutting board. Using a sharp serrated knife, carefully cut the bread in one direction into deep slices, stopping about ½ inch from the bottom. The loaf should remain intact.
Rotate the bread 90 degrees and repeat the process, creating a crosshatch or grid pattern. This allows the garlic butter and cheese to seep into every crevice, ensuring flavor in every bite.
Tip: Take your time here. Clean, even cuts help the bread pull apart easily after baking.
Step 2: Making the Garlic Butter Mixture
In a small saucepan over low heat—or in a microwave-safe bowl—combine the butter (or ghee) and olive oil. Heat just until melted and combined. Do not let it bubble or brown.
Remove from heat and stir in:
-
Minced garlic
-
Parsley
-
Italian seasoning
-
Salt
-
Black pepper
Let the mixture sit for 2–3 minutes. This allows the garlic and herbs to bloom gently in the warm fat, intensifying their flavor without burning.
Step 3: Infusing the Bread
Using a pastry brush or spoon, generously drizzle the garlic butter mixture into every cut of the bread. Gently pry the sections apart with your fingers to ensure the mixture reaches deep inside.
Do not rush this step—this is where the flavor is built. Any remaining garlic butter can be brushed over the top of the loaf.
Step 4: Stuffing with Cheese
Begin stuffing the cheese mixture into the cuts. Start with mozzarella for maximum stretch, then layer in cheddar or provolone for flavor, and finish with Parmesan for savory depth.
Press the cheese down gently but firmly. It should be packed generously without breaking the bread.
If using red pepper flakes or extra herbs, sprinkle them between layers of cheese.
Cooking Methods
Option 1: Oven Method (Classic & Crowd-Friendly)
-
Preheat oven to 375°F (190°C)
-
Wrap the stuffed bread loosely in foil
-
Place in a baking dish or on a baking sheet
-
Bake for 15 minutes covered
-
Uncover and bake for another 10–15 minutes until the cheese is fully melted and the top is golden
For extra crispiness, broil for 1–2 minutes at the end—watch carefully.
Option 2: Air Fryer Method (As Shown in the Image)
-
Preheat air fryer to 350°F (175°C)
-
Place the bread in the basket or on the tray
-
Cook for 8–10 minutes until cheese melts
-
Increase temperature to 380°F and cook another 2–4 minutes for a crispy top
Air fryers produce an exceptionally crisp crust while keeping the inside soft and gooey.
Resting and Serving
Remove the bread from the oven or air fryer and let it rest for 2–3 minutes. This allows the cheese to settle slightly while remaining molten.
Transfer to a serving plate or present directly in the basket or skillet for a rustic look.
Garnish with:
-
Extra chopped parsley
-
Grated Parmesan
-
A drizzle of olive oil
Serve warm and encourage everyone to pull apart their own pieces.
Flavor and Texture Breakdown
-
Exterior: Crisp, golden, buttery crust
-
Interior: Soft, fluffy bread soaked with garlic butter
-
Cheese: Stretchy, gooey, savory, and rich
-
Aroma: Garlic, herbs, toasted bread—utterly irresistible
Variations and Customizations
Cheese Variations
-
Mozzarella + Gruyère for elegance
-
Mozzarella + Pepper Jack for spice
-
Fontina for ultra-creamy melt
Add Protein
-
Crispy bacon bits
-
Pepperoni slices
-
Cooked sausage crumbles
Herb & Flavor Twists
-
Pesto brushed into the cuts
-
Roasted garlic instead of raw
-
Truffle oil drizzle after baking
Healthier Adjustments
-
Use ghee instead of butter
-
Reduce cheese slightly and add herbs
-
Choose whole-grain artisan bread
Serving Suggestions
Pull-apart garlic bread pairs beautifully with:
-
Pasta dishes
-
Tomato soup or minestrone
-
Salads with vinaigrette
-
Grilled meats or roasted vegetables
It also works as:
-
A party appetizer
-
Game-day snack
-
Late-night comfort food
Storage and Reheating
Storage
-
Wrap leftovers tightly in foil
-
Refrigerate for up to 2 days
Reheating
-
Oven: 350°F for 8–10 minutes
-
Air fryer: 350°F for 3–5 minutes
Avoid microwaving—it softens the crust too much.
Final Thoughts
This Pull-Apart Cheese Garlic Bread is the kind of recipe people ask for immediately after the first bite. It’s simple but indulgent, familiar yet impressive, and endlessly adaptable. Whether you’re baking it for loved ones or treating yourself, this is one of those recipes that earns a permanent place in your collection.