Ingredients (Simple, Precise, Perfect)
For 1 pound (450 g) bacon:
-
1 lb thick-cut bacon (this works best, but thin works too)
-
1½–2 teaspoons cornstarch
-
Optional (choose one if you want flair):
-
Fresh cracked black pepper
-
Smoked paprika
-
A tiny pinch of cayenne
-
A whisper of brown sugar (½ tsp max)
-
That’s it. No oil. No butter. Bacon brings its own party.
Equipment (Don’t Skip This Part)
-
Rimmed baking sheet
-
Parchment paper or aluminum foil
-
Wire rack (optional but recommended)
-
Paper towels
Yes, this is an oven method—and that’s intentional.
Step 1: Start With Cold Bacon
Do not bring the bacon to room temperature.
Cold bacon:
-
Renders fat more slowly
-
Shrinks less
-
Holds its shape better
Lay the strips flat on a cutting board or parchment.
Step 2: The Cornstarch Dusting (This Is the Moment)
Place the bacon in a large bowl or keep it laid out flat.
Sprinkle 1½–2 teaspoons cornstarch evenly over the bacon.
Important rules:
-
Do not dump it in one spot
-
Do not overcoat
-
You should barely see it
Using clean hands, gently toss or rub the bacon so each strip gets a light, even dusting.
If you’re adding spices, mix them into the cornstarch first, then apply.
The bacon should look:
-
Dry on the surface
-
Not white
-
Not pasty
If it looks floury, you used too much—brush off the excess.
Step 3: Arrange Like a Pro
Line your baking sheet with parchment or foil.
If using a wire rack:
-
Place it on the sheet
-
Lay bacon strips flat, not overlapping
If not using a rack:
-
Lay bacon directly on the lined sheet
-
Leave a little space between strips
Straighten each strip gently. This helps them stay flat as they cook.
Step 4: Cold Oven Start (Chef Trick #2)
This part matters.
Put the bacon into a cold oven.
Then set the temperature to 400°F (205°C).
Why?
-
Gradual heat = slow fat render
-
Slow render = flatter bacon
-
Flatter bacon = even crispness
Step 5: Bake to Perfection
Total cook time: 18–25 minutes, depending on thickness and oven.
Around minute 12–15:
-
Rotate the pan
-
Flip the bacon only if not using a rack
Watch for:
-
Deep golden-amber color
-
Bubbling fat
-
Firm edges that look “set”
When done, the bacon will still look slightly flexible—but it will crisp more as it cools.
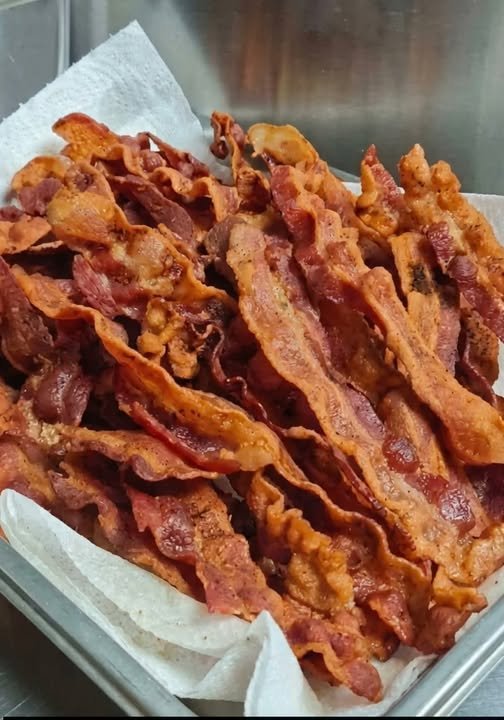
Step 6: Drain and Rest (Yes, Rest!)
Transfer bacon to paper towels.
Let it rest 2–3 minutes.
This is when the magic finishes:
-
Steam escapes
-
The cornstarch crust hardens
-
The crunch locks in
Now tap it.
Hear that? That’s the sound of success.
What the Texture Should Be Like
Proper cornstarch bacon:
-
Snaps cleanly
-
Doesn’t shatter into crumbs
-
Isn’t greasy on the fingers
-
Stays crisp longer than regular bacon
Even after cooling, it keeps that crunch. Reheated? Still crispy.
Flavor Variations (Optional but Amazing)
Once you’ve mastered the base version, try these:
Black Pepper Bistro Bacon
Cornstarch + heavy cracked pepper
Perfect for BLTs and breakfast plates
Smoked Paprika Bacon
Adds warmth and color without sweetness
Amazing with eggs
Sweet-Savory Brunch Bacon
Cornstarch + tiny pinch brown sugar
Caramelized, but not sticky
Spicy Bacon
Cornstarch + cayenne + black pepper
Excellent in burgers or crumbled on salads
Common Mistakes (Avoid These)
❌ Too much cornstarch
→ Chalky texture
❌ Overlapping strips
→ Uneven cooking
❌ High heat from the start
→ Curling and burning
❌ Skipping the rest time
→ Limp bacon disappointment
Why Chefs Love This Method
-
Consistent results
-
Cleaner grease
-
Better presentation
-
Holds shape for plating and sandwiches
It’s especially popular in diners, brunch spots, and upscale cafés where bacon needs to look perfect every single time.
Final Thoughts
This isn’t gimmick bacon.
This isn’t “internet hack” bacon.
This is quietly brilliant, chef-approved, never-going-back bacon.