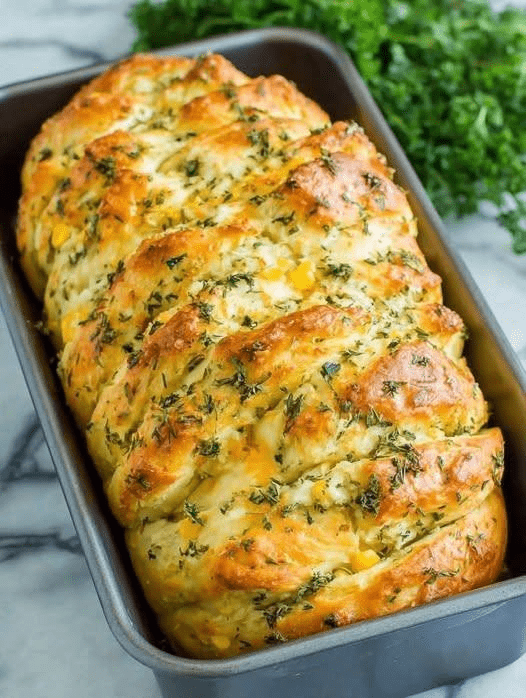
This Cheesy Herb Pull-Apart Bread is one of those recipes that instantly becomes a favorite once you try it. It looks impressive, tastes incredible, and surprisingly takes very little effort to prepare. With a golden crust on top, soft fluffy bread inside, and pockets of melted cheese and herbs throughout, every bite is packed with flavor.
Many people first make this bread for a dinner party or family gathering and then continue making it regularly at home. That’s because it combines comfort, simplicity, and irresistible taste. The bread is soft and airy, the herbs add freshness, and the melted cheese creates a rich savory flavor that makes it impossible to stop at just one piece.
What makes this recipe even better is that it takes only about 10 minutes to prepare before baking. After that, the oven does the rest of the work.
Why This Bread Is So Popular
This recipe has become popular for several reasons.
Quick Preparation
The dough can be assembled in about 10 minutes, making it perfect for busy days.
Perfect for Sharing
Because it is pull-apart bread, people can simply tear off pieces without slicing.
Soft and Fluffy Texture
The inside stays soft and airy while the outside becomes golden and slightly crisp.
Loaded With Flavor
Butter, garlic, herbs, and cheese create a delicious savory combination.
Great for Many Occasions
This bread works for family dinners, parties, potlucks, or holiday meals.
Ingredients
The ingredients are simple and easy to find.
For the Bread
-
3 cups all-purpose flour
-
2 teaspoons instant yeast
-
1 tablespoon sugar
-
1 teaspoon salt
-
1 cup warm milk
-
2 tablespoons melted butter
-
1 large egg
For the Cheese Filling
-
1 cup shredded mozzarella cheese
-
½ cup shredded cheddar cheese
-
½ cup sweet corn kernels (optional but delicious)
-
2 tablespoons chopped parsley
-
1 tablespoon chopped chives
For the Garlic Herb Butter
-
3 tablespoons melted butter
-
2 cloves garlic, minced
-
1 teaspoon dried oregano
-
1 teaspoon dried thyme
-
½ teaspoon salt
Equipment Needed
You only need a few kitchen tools.
-
Mixing bowl
-
Spoon or spatula
-
Loaf pan
-
Pastry brush
-
Oven
Step 1: Preparing the Dough
Start by preparing the dough base.
-
In a large mixing bowl, combine:
-
Flour
-
Instant yeast
-
Sugar
-
Salt
-
-
Mix these dry ingredients well.
-
Add warm milk, melted butter, and the egg.
-
Mix everything together until a soft dough forms.
If the dough feels sticky, add a little extra flour.
Step 2: Kneading the Dough
Place the dough on a lightly floured surface.
Knead it for about 5–7 minutes until it becomes smooth and elastic.
Kneading helps develop gluten, which gives the bread its soft structure.
Once kneaded, place the dough back into the bowl and cover it.
Let it rest for about 30–40 minutes until it doubles in size.
Step 3: Preparing the Filling
While the dough rises, prepare the filling.
In a bowl combine:
-
Mozzarella cheese
-
Cheddar cheese
-
Corn kernels
-
Chopped parsley
-
Chives
Mix everything together.
This mixture will melt beautifully inside the bread.
Step 4: Shaping the Pull-Apart Bread
Once the dough has risen, punch it down gently.
Roll the dough into a large rectangle about ½ inch thick.
Cut the dough into square pieces.
Now take each piece and sprinkle some cheese mixture on top.
Stack the pieces loosely.
Step 5: Arranging in the Loaf Pan
Grease a loaf pan lightly with butter.
Place the stacked dough pieces vertically inside the pan.
This arrangement allows the bread to pull apart easily after baking.
Once arranged, cover the pan and let the dough rest for another 15 minutes.
Step 6: Preparing the Garlic Herb Butter
In a small bowl mix together:
-
Melted butter
-
Minced garlic
-
Oregano
-
Thyme
-
Salt
Brush this mixture generously over the top of the bread.
This step adds incredible flavor and aroma.
Step 7: Baking the Bread
Preheat the oven to 180°C (350°F).
Place the loaf pan in the center of the oven.
Bake for 30–35 minutes.
The bread should become golden brown on top with melted cheese bubbling between the layers.
Step 8: Cooling and Serving
Remove the bread from the oven and allow it to cool for 10 minutes.
This helps the structure set properly.
Then gently remove the bread from the pan.
Place it on a serving plate and let everyone pull off pieces.
How to Serve This Bread
This bread is delicious on its own but can also be served with other dishes.
Great Pairings
-
Tomato soup
-
Creamy pasta
-
Grilled chicken
-
Salads
-
Roasted vegetables
It also works wonderfully as a party appetizer.
Flavor Variations
You can customize this recipe easily.
Garlic Cheese Bread
Add extra garlic and parmesan cheese.
Jalapeño Cheese Bread
Add chopped jalapeños for a spicy kick.
Mediterranean Version
Add olives, feta cheese, and oregano.
Bacon Cheese Bread
Mix crispy bacon pieces into the filling.
Tips for Perfect Pull-Apart Bread
Use Warm Milk
Warm milk activates the yeast and helps the dough rise.
Do Not Overbake
Overbaking can make the bread dry.
Use Good Quality Cheese
Better cheese creates richer flavor and better melting.
Brush Butter Generously
The garlic herb butter adds moisture and flavor.
Storage Instructions
If you have leftovers, they store well.
Refrigerator
Place in an airtight container for up to 3 days.
Freezer
Wrap the bread tightly and freeze for up to 2 months.
Reheating
To reheat and restore the softness:
-
Oven: 10 minutes at 160°C (320°F)
-
Air fryer: 5 minutes at 160°C
Avoid microwaving too long because it may make the bread chewy.
Nutritional Benefits
Although this bread is a comfort food, it also provides:
-
Protein from cheese
-
Calcium from dairy
-
Energy from carbohydrates
Adding herbs also introduces antioxidants and extra flavor.
Why Guests Always Love It
This bread is a guaranteed crowd-pleaser.
When served warm, the aroma of garlic, butter, and melted cheese fills the room. Guests enjoy pulling apart the soft layers and discovering pockets of gooey cheese and herbs inside.
It feels homemade, comforting, and satisfying.
That’s why many people first make it for a special occasion and then continue making it regularly for family meals.
Final Thoughts
Cheesy Herb Pull-Apart Bread is one of the easiest and most satisfying homemade breads you can make. With just a few basic ingredients and minimal preparation time, you get a beautiful loaf that tastes like it came from a bakery.