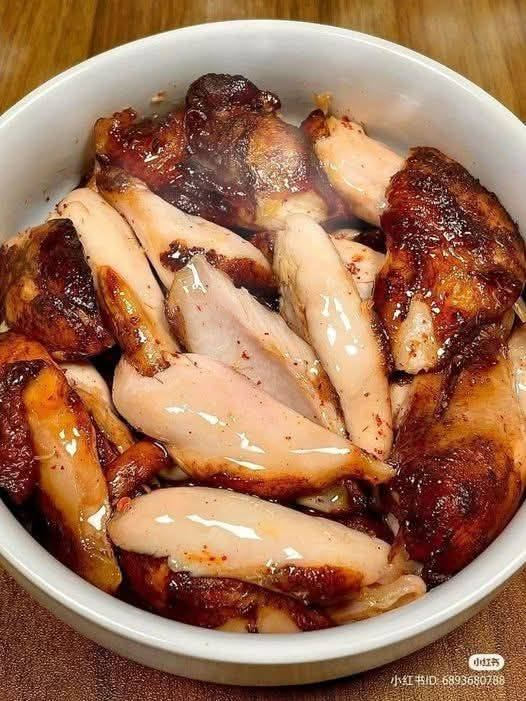
If you’re looking for a chicken recipe that delivers maximum flavor with minimal effort, air fryer chicken thighs are about to become your new favorite. They’re incredibly crispy on the outside, tender and juicy on the inside, and ready in just 25 minutes of cooking time. No deep frying, no oven preheating, and no complicated steps—just perfectly cooked chicken every single time.
Chicken thighs are naturally more flavorful than chicken breasts thanks to their higher fat content, and when cooked in the air fryer, that fat renders beautifully, creating irresistibly crispy skin while keeping the meat moist. Whether you’re cooking for your family on a busy weeknight or meal-prepping for the week ahead, this recipe checks every box: easy, fast, affordable, and delicious.
Why You’ll Love This Air Fryer Chicken Thigh Recipe
There are many ways to cook chicken thighs, but the air fryer might just be the best method of all. Here’s why:
-
Crispy skin without deep frying – The air fryer circulates hot air around the chicken, crisping the skin evenly without needing a vat of oil.
-
Juicy meat every time – Dark meat stays moist even at higher temperatures.
-
Fast cooking – Dinner is ready in about 25 minutes.
-
Minimal cleanup – One basket, one bowl, done.
-
Versatile flavor profile – Works with countless seasoning blends and sauces.
-
Perfect for beginners – Hard to mess up, even if you’re new to air frying.
Total Time and Yield
-
Prep Time: 10 minutes
-
Cook Time: 25 minutes
-
Total Time: 35 minutes
-
Yield: 4 servings
Ingredients
For the Chicken
-
6 to 8 bone-in, skin-on chicken thighs (about 2 to 2½ pounds)
-
1½ tablespoons olive oil or avocado oil
Seasoning Blend (Classic Savory)
-
1 teaspoon kosher salt
-
1 teaspoon smoked paprika
-
1 teaspoon garlic powder
-
½ teaspoon onion powder
-
½ teaspoon black pepper
-
½ teaspoon dried thyme or Italian seasoning
-
¼ teaspoon cayenne pepper (optional, for heat)
Optional Add-Ons and Flavor Variations
You can easily customize this recipe depending on your mood or what you have in your pantry:
-
BBQ Style: Add 1 teaspoon brown sugar and brush with BBQ sauce during the last 5 minutes.
-
Lemon Herb: Add lemon zest, rosemary, and oregano.
-
Asian-Inspired: Add ginger powder and finish with soy sauce and honey.
-
Garlic Butter: Toss with melted garlic butter after cooking.
-
Spicy Cajun: Use Cajun seasoning and add extra cayenne.
Equipment Needed
-
Air fryer (basket-style or oven-style)
-
Small mixing bowl
-
Tongs
-
Instant-read meat thermometer (recommended)
-
Paper towels
Step-by-Step Instructions
Step 1: Prepare the Chicken
Start by removing the chicken thighs from their packaging. Pat them very dry using paper towels. This step is crucial. Moisture is the enemy of crispiness, and drying the skin thoroughly will help it crisp up beautifully in the air fryer.
If your thighs have excess skin or fat hanging off the edges, you can trim it slightly, but this is optional.
Step 2: Season the Chicken
Place the chicken thighs in a large bowl. Drizzle with olive oil and rub it all over the chicken, making sure every piece is lightly coated.
In a separate small bowl, mix together:
-
Salt
-
Smoked paprika
-
Garlic powder
-
Onion powder
-
Black pepper
-
Thyme
-
Cayenne (if using)
Sprinkle the seasoning evenly over the chicken thighs. Use your hands to massage the seasoning into the skin and meat. Don’t forget the underside of the thighs—seasoning both sides ensures full flavor.
Step 3: Preheat the Air Fryer
Preheat your air fryer to 380°F (193°C) for about 3–5 minutes. While not all air fryers require preheating, doing so helps the chicken start cooking immediately and promotes crispier skin.
Step 4: Arrange Chicken in the Basket
Place the chicken thighs skin-side down in the air fryer basket. Make sure they are in a single layer and not overlapping. Overcrowding will trap steam and prevent proper crisping, so cook in batches if necessary.
Step 5: First Cook Cycle
Air fry at 380°F for 12 minutes.
During this time, the fat will begin to render, and the meat will start cooking through.
Step 6: Flip and Continue Cooking
After 12 minutes, carefully flip the chicken thighs skin-side up using tongs. This is where the magic happens—the skin will now crisp and turn golden brown.
Continue cooking at 380°F for another 10–13 minutes, depending on the size of your thighs.
Step 7: Check for Doneness
Chicken thighs are done when:
-
The internal temperature reaches 165°F (74°C) at the thickest part.
-
The juices run clear.
-
The skin is crispy and deep golden brown.
If you want extra crispy skin, increase the temperature to 400°F and cook for an additional 2–3 minutes.
Step 8: Rest the Chicken
Remove the chicken thighs from the air fryer and let them rest for 5 minutes before serving. Resting allows the juices to redistribute throughout the meat, ensuring every bite is juicy and flavorful.
Serving Suggestions
Air fryer chicken thighs pair beautifully with a wide variety of side dishes:
-
Mashed potatoes or garlic butter rice
-
Roasted vegetables or air fryer broccoli
-
Coleslaw or a crisp green salad
-
Mac and cheese
-
Corn on the cob
-
Dinner rolls or biscuits
For a lighter meal, serve with steamed vegetables or a cucumber-tomato salad.
Storage and Reheating
Storing
-
Store leftovers in an airtight container in the refrigerator for up to 4 days.
Reheating
-
Reheat in the air fryer at 350°F for 5–7 minutes to re-crisp the skin.
-
Avoid the microwave if possible, as it softens the skin.
Make-Ahead and Meal Prep Tips
-
Season the chicken up to 24 hours in advance and keep it covered in the refrigerator.
-
Cooked thighs freeze well for up to 2 months.
-
Perfect for weekly meal prep—use in salads, wraps, grain bowls, or sandwiches.
Common Mistakes to Avoid
-
Skipping the drying step – This prevents crispy skin.
-
Overcrowding the basket – Leads to steaming instead of frying.
-
Not flipping the chicken – Both sides need airflow.
-
Under-seasoning – Chicken thighs can handle bold flavors.
-
Overcooking – Use a thermometer for best results.
Final Thoughts
Air fryer chicken thighs are one of those recipes that once you master, you’ll return to again and again. They’re fast enough for weeknights, impressive enough for guests, and flexible enough to adapt to any flavor profile you love. With minimal ingredients and foolproof steps, this recipe proves that incredible food doesn’t have to be complicated.