If you’ve ever looked at the price of bread in the store and thought, “I can’t believe how expensive this has become,” this recipe is for you. If you’ve ever felt intimidated by bread baking because of kneading, fancy equipment, or complicated steps, this recipe is also for you. And if you simply want fresh, warm, homemade bread that costs pennies and fills your home with the most comforting smell imaginable—welcome. You’re exactly where you need to be.
This is the bread recipe that made me stop buying bread completely. No stand mixer. No kneading. No eggs. No butter. No stress. Just simple pantry ingredients, a bowl, a spoon, and time. The result? Soft on the inside, beautifully crusty on the outside, and perfect for sandwiches, toast, soup, or simply tearing apart while it’s still warm.
Once you make this bread, it becomes part of your routine. It’s forgiving, flexible, and almost impossible to mess up. Even if you’ve never baked bread before, this recipe will make you feel like a pro.
Why This Bread Recipe Works
This bread relies on time instead of effort. Instead of kneading, we allow the dough to rest and ferment slowly. During this resting time, gluten develops naturally, creating structure and chew without any physical work from you.
Because there are no eggs, butter, or milk, this bread is:
-
Budget-friendly
-
Vegan
-
Dairy-free
-
Perfect for everyday baking
It’s the kind of bread people have made for generations with nothing more than flour, water, yeast, and salt.
Ingredients (Very Simple!)
You only need four basic ingredients:
-
4 cups all-purpose flour (or bread flour)
-
1½ teaspoons salt
-
1 teaspoon instant yeast (or active dry yeast)
-
2 cups warm water (not hot)
That’s it. No sugar required. No oil required. No fancy additions.
Optional Add-Ins (If You Want to Customize)
Once you’re comfortable with the basic recipe, you can experiment with:
-
Seeds (sunflower, sesame, flax)
-
Herbs (rosemary, thyme, oregano)
-
Garlic powder or minced garlic
-
Whole wheat flour (replace up to 1 cup)
But for your first time, I recommend keeping it plain.
Step 1: Mixing the Dough (5 Minutes)
In a large mixing bowl, add the flour, salt, and yeast. Stir them together with a spoon or spatula until evenly combined.
Slowly pour in the warm water while stirring. Continue mixing until all the flour is hydrated. The dough will look shaggy, sticky, and messy. This is exactly what you want.
Do not add extra flour. Do not knead. Just make sure there are no dry patches.
Cover the bowl with plastic wrap, a lid, or a clean kitchen towel.
Step 2: Let Time Do the Work (8–12 Hours)
Place the covered bowl at room temperature and let it rest for at least 8 hours, preferably overnight. You can leave it up to 18 hours if your kitchen is cool.
During this time:
-
The yeast slowly ferments
-
The dough develops flavor
-
Gluten forms naturally
-
Bubbles appear on the surface
When it’s ready, the dough will look puffed, airy, and slightly jiggly with visible bubbles.
Step 3: Shaping (No Kneading!)
Lightly flour your countertop or work surface. Gently scrape the dough out of the bowl using a spatula.
With floured hands, gently fold the dough over itself a few times—just enough to form a loose ball. Do not knead. Do not punch it down aggressively. Be gentle.
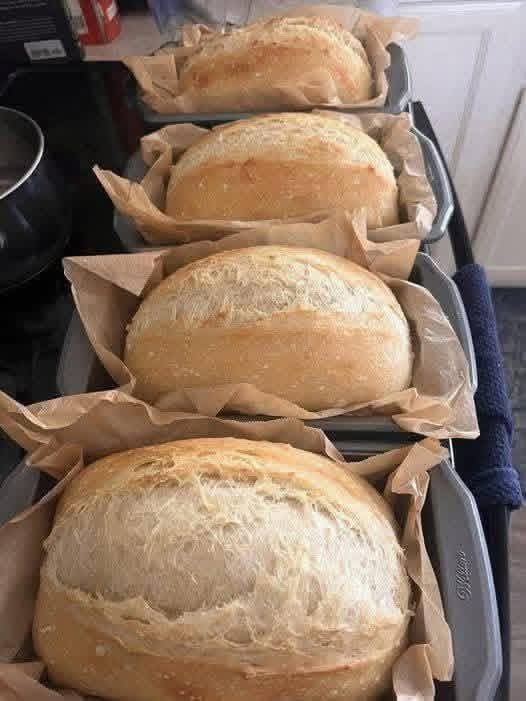
Place the dough onto a piece of parchment paper. If you’re making multiple loaves, divide the dough gently and shape each portion.
Cover loosely and let rest for 30–45 minutes while your oven preheats.
Step 4: Baking
Preheat your oven to 425°F (220°C).
If using loaf pans:
-
Line them with parchment paper
-
Gently place the dough inside
If baking free-form:
-
Place the parchment with dough directly on a baking tray
Optional: Dust the top lightly with flour and make a shallow slit with a sharp knife.
Bake for 30–40 minutes, until:
-
The crust is golden brown
-
The loaf sounds hollow when tapped
-
Your kitchen smells amazing
For an extra crispy crust, place a small oven-safe dish of hot water on the lower rack during baking.
Step 5: Cooling (Important!)
Remove the bread from the oven and let it cool on a rack for at least 30 minutes.
I know it’s tempting to cut into it immediately—but cooling allows the inside to finish setting. Cutting too early can make the crumb gummy.
Once cooled, slice and enjoy.
Texture & Flavor
-
Crust: Lightly crisp and rustic
-
Inside: Soft, airy, slightly chewy
-
Flavor: Mild, comforting, and perfect for everything
This bread is excellent for:
-
Toast
-
Sandwiches
-
Soup dipping
-
Breakfast with jam
-
Garlic bread
-
Breadcrumbs
Storage Tips
-
Store at room temperature in a cloth or paper bag for 2–3 days
-
Freeze slices for up to 3 months
-
Toast straight from frozen—no thawing needed
Because this bread has no preservatives, it’s best enjoyed fresh.
Common Questions
Can I use whole wheat flour?
Yes. Replace up to 25–30% of the flour for best results.
What if I don’t have instant yeast?
Active dry yeast works the same. No need to bloom it separately.
Why is my dough sticky?
That’s normal. This is a high-hydration dough.
Can I double the recipe?
Absolutely. It scales very well.
Why This Bread Saves Money
Store-bought bread prices keep rising, but this loaf costs only a fraction to make. One bag of flour can produce many loaves, making this one of the cheapest homemade foods you can bake.
And the satisfaction of pulling fresh bread from your oven? Priceless.
Final Thoughts
This is not just a recipe—it’s freedom from store-bought bread. It’s confidence in your kitchen. It’s the joy of simple ingredients turning into something nourishing and beautiful.