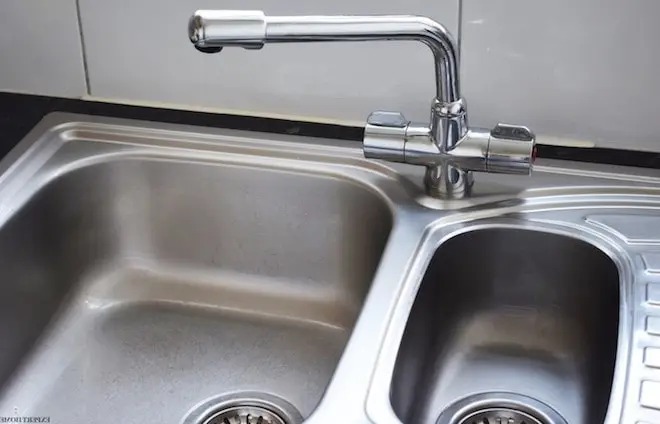
An undermount kitchen sink is a type of sink that is installed under the countertop, with the rim of the sink sitting flush with the bottom of the counter. An Installment of undermount kitchen sink is typically done using clips that are attached to the bottom of the sink, which are then screwed into the bottom of the countertop to hold the sink in place. So Read Carefully If You want to Install Undermount kitchen Sink and want to save your Money.
Can I Install an Undermount Sink Myself?
Installing an undermount sink can be a challenging DIY project, but it is possible for an experienced and handy homeowner to do it themselves. However, it requires a certain level of skill, knowledge, and the right tools.
Before installing an undermount sink, you will need to make sure that the countertop is properly prepared, and that you have the necessary tools and materials on hand. The process typically involves cutting a hole in the countertop for the sink, attaching the sink clips to the sink, and then securing the sink to the countertop.
How do I know If my Undermount Sink will Fit?
To determine if an undermount sink will fit, you will need to measure the dimensions of the sink and compare them to the dimensions of the cutout in the countertop. The sink should be slightly smaller than the cutout in order to fit properly.
Additionally, the sink should have enough clearance on the sides and back to allow for proper installation and use. If you are unsure if a specific sink will fit, it is always best to consult the manufacturer’s specifications or consult a professional.
Step by Step Guide to Install Undermount kitchen Sink

Installing an undermount kitchen sink involves several steps, including preparing the countertop, attaching the sink to the countertop, and connecting the plumbing. Here is a detailed breakdown of each step:
Prepare the countertop:
Measure the sink and the cutout in the countertop to ensure that the sink will fit properly. Clean the countertop and the sink to remove any dust or debris.
Apply a bead of silicone sealant:
Apply a bead of silicone sealant around the edge of the cutout in the countertop. This will help to secure the sink and prevent leaks.
Place the sink into the cutout:
Carefully lower the sink into the cutout, making sure that it is centered and level. Use a spirit level to check that the sink is level.
Secure the sink:
Use clamps or another type of sink fastener to secure the sink to the countertop. Make sure that the sink is tightly secured and that there are no gaps between the sink and the countertop.
Connect the plumbing:
Attach the plumbing to the sink, following the manufacturer’s instructions. This typically involves connecting the drain and the faucet to the sink.
Test for leaks:
Turn the water supply on and check for any leaks. If there are leaks, tighten the connections and check again.
Clean and seal:
Once the sink is installed and the plumbing is connected, clean the sink and the countertop and apply a sealant to the edges of the sink to prevent leaks.
You May Also Interested:
- How to Fix Leak kitchen Sink
- How to Tighten kitchen Faucet Nut Under Sink
- How to Unclog a Double kitchen sink
- How to Increase Water Pressure in kitchen Sink
FREQUENTLY ASKED QUESTIONS
Are undermount sinks harder to install?
Undermount sinks can be more difficult to install than drop-in sinks because the sink needs to be securely attached to the underside of the countertop. This typically requires the use of specialized mounting hardware and techniques, and may also involve cutting a precise opening in the countertop. However, with the correct tools and knowledge it can be done.
How do you attach an undermount sink to a granite countertop?
Attaching an undermount sink to a granite countertop typically involves the following steps:
- Measure and mark the location of the sink on the countertop.
- Use a circular saw or a router to cut out the opening for the sink in the granite countertop.
- Clean the surface of the countertop and the sink to remove any debris.
- Apply a bead of silicone caulk around the top edge of the sink.
- Place the sink into the opening in the countertop, making sure it is centered and level.
- Use a series of clips or brackets to secure the sink to the underside of the countertop.
- Allow the caulk to dry completely before using the sink.
Which sink is better undermount or top mount?
Both undermount and top mount sinks have their own advantages and disadvantages. Undermount sinks have a sleek, modern look and are easy to clean since there is no lip or rim on the countertop.
However, they can be more difficult to install and may not be suitable for all countertop materials. Top mount sinks, on the other hand, are easier to install and can be used with a wider variety of countertop materials. However, they have a lip or rim on the countertop that can be harder to clean.
What adhesive is used for an undermount sink to quartz?
There are a few different types of adhesives that can be used to install an undermount sink to a quartz countertop. Some popular options include:
Epoxy: Epoxy is a two-part adhesive that is mixed together before application. It creates a strong bond and is often used in industrial and commercial settings.
Silicone: Silicone is a flexible, waterproof adhesive that is often used in kitchens and bathrooms. It is easy to work with and can be used to seal around the edges of the sink to prevent leaks.
Acrylic adhesive: Acrylic adhesive is a strong, fast-drying adhesive that is often used for bonding metal, glass, and other materials.
Does an undermount sink need holes?
An undermount sink typically does not need any holes for the faucet or other fixtures because the sink is mounted underneath the countertop, rather than sitting on top of it. The faucet and other fixtures are installed directly onto the countertop. However, some undermount sinks may have pre-drilled holes for a soap dispenser, sprayer, or other accessories.