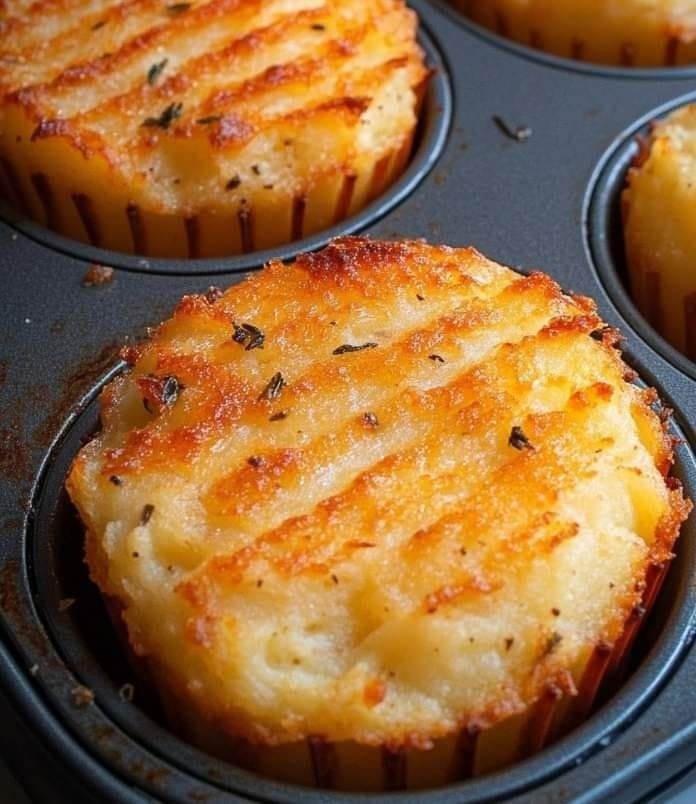
Mashed Potato Muffins Recipe,
Crispy on the outside, soft and cheesy on the inside
Overview:
Prep Time: 15 minutes
Cook Time: 20–25 minutes
Total Time: ~40 minutes
Servings: Makes 12 standard muffins
Skill Level: Easy
These savory muffins are perfect for using up leftover mashed potatoes or simply creating a unique, comforting treat from scratch. Great for breakfast, lunchboxes, brunch, or a cozy dinner side. Cooking classes online
Ingredients
Main Mixture:
2 cups mashed potatoes (leftovers or freshly made, smooth or slightly chunky)Ingredient delivery service
1 cup grated cheddar cheese
¼ cup shredded Parmesan cheese
¼ cup sour cream
2 large eggs (lightly beaten)
¼ cup chopped green onions or chives
¼ cup cooked bacon bits (optional, for added flavor)
1 tsp garlic powder
1 tsp onion powder
Salt and pepper to taste
Dry Ingredients:
½ cup all-purpose flour
1 tsp baking powder
For Topping:
2 tablespoons melted butter (for brushing before baking)
Extra cheese or chives for garnish (optional)
Step-by-Step Instructions
Step 1: Preheat & Prep Muffin Tin
Preheat your oven to 375°F (190°C).Muffin tin set
Prepare a standard 12-cup muffin tin by:
Greasing each cup with nonstick spray or melted butter
Or lining with paper muffin liners
Greasing helps achieve a crispier outside, while liners make cleanup easier.
Step 2: Make the Mashed Potato Mixture
In a large mixing bowl, combine:
2 cups of mashed potatoes
1 cup grated cheddar cheeseGrated cheddar cheese
¼ cup shredded Parmesan cheese
¼ cup sour cream
2 beaten eggs
¼ cup green onions or chives
¼ cup bacon bits (if using)
1 tsp garlic powder
1 tsp onion powder
Salt and pepper (start with ¼ tsp each and adjust to taste)
Stir everything together until the ingredients are evenly mixed.
The mixture will be thick, cheesy, and well-seasoned.
Step 3: Add Flour and Baking Powder
Sprinkle ½ cup flour and 1 tsp baking powder over the mashed potato mixture.Potato cookbook
Gently fold it in using a spatula or wooden spoon until fully incorporated.
The mixture should be thick and spoonable, not runny.
The flour and baking powder help bind the muffins and give them a bit of rise during baking.
Step 4: Fill the Muffin Tin
Spoon the mixture into each muffin cup, filling each about ¾ full.
Smooth the tops with the back of a spoon or a small spatula.
Step 5: Add the Topping
Brush the tops of each filled muffin with melted butter — this helps them brown nicely.Muffin baking supplies
Optional: Sprinkle with a little extra cheese or chopped chives for a beautiful finish.
Step 6: Bake the Muffins
Place the muffin tin in the preheated oven and bake for 20–25 minutes, or until:
The tops are golden brown
The muffins feel firm when lightly pressed
A toothpick inserted into the center comes out clean
Begin checking at 20 minutes; ovens may vary slightly.
Muffin tin set
Step 7: Cool and Serve
Remove the muffins from the oven and let them cool in the pan for 5–10 minutes.
Carefully remove each muffin and place on a wire rack to cool slightly.
Serve warm as:
A breakfast with eggs
A side dish with dinner (great with roasted meat or soup)
A snack with a dollop of sour cream or ketchup
Dinnerware set
Tips & Variations:
Cheese Variations: Try mozzarella, pepper jack, or Gruyère for different flavors.
Vegetarian: Skip the bacon or replace it with sautéed mushrooms or spinach.
Extra Flavor: Mix in a tablespoon of Dijon mustard, fresh herbs, or even chopped jalapeños.
Mini Muffins: Use a mini muffin pan for bite-sized versions; reduce baking time to ~12–15 minutes. Grated cheddar cheese
Storage & Reheating
Fridge: Store in an airtight container for up to 4 days.
Freezer: Wrap individually and freeze up to 2 months.
To Reheat: Bake at 350°F (175°C) for 10 minutes or microwave for 30–45 seconds.
Final Thoughts:
Mashed Potato Muffins are a fun, kid-friendly, and comforting twist on classic potatoes. Whether you’re using up leftovers or starting from scratch, they come together easily and deliver rich flavor and crispy texture in every bite. Potato cookbook
They’re an excellent addition to lunchboxes, holiday spreads, or even brunch tables. Try them once — they might become a family favorite!
Enjoy your baking! Would you like a printable version or a visual step-by-step guide?